• Skip to primary navigation
  • Skip to main content
  • Skip to primary sidebar
  • Skip to footer

Charlotte Pike

Food & Drink Expert

  • About
  • Writing
  • Consulting
  • Speaking
  • Contact

Baking

Dark chocolate cookies

21 October 2014 By Charlotte Pike

DSC_0273

Over the last few weeks, I’ve been experimenting with cookies, and what makes the perfect cookie. Cookies are quite a personal thing – not everyone likes the same thing, but generally, people can agree on a crispy edge and a softer centre as desired qualities for a jolly good cookie.

For me, a soft cookie is a very good thing. Soft centred, and a little chewy, but not in the way of synthetic, over-sugared supermarket fare. I am also not a fan of the fat, crumby cookies – they are large, but insubstantial and unsatisfying.

Soft cookies get their texture from a mix of sugars and raising agents. Brown sugar gives a chewier texture and caster sugar makes them crispier and crunchier. Baking powder and bicarbonate of soda give them a more open texture – something  I don’t rate in a cookie. 

These cookies are soft and I am careful not to overcook them, so they stay as soft as possible, too. Cooling them briefly on the baking tray will cook them a little further before allowing them to cool on a wire rack, which will prevent them from becoming soggy.

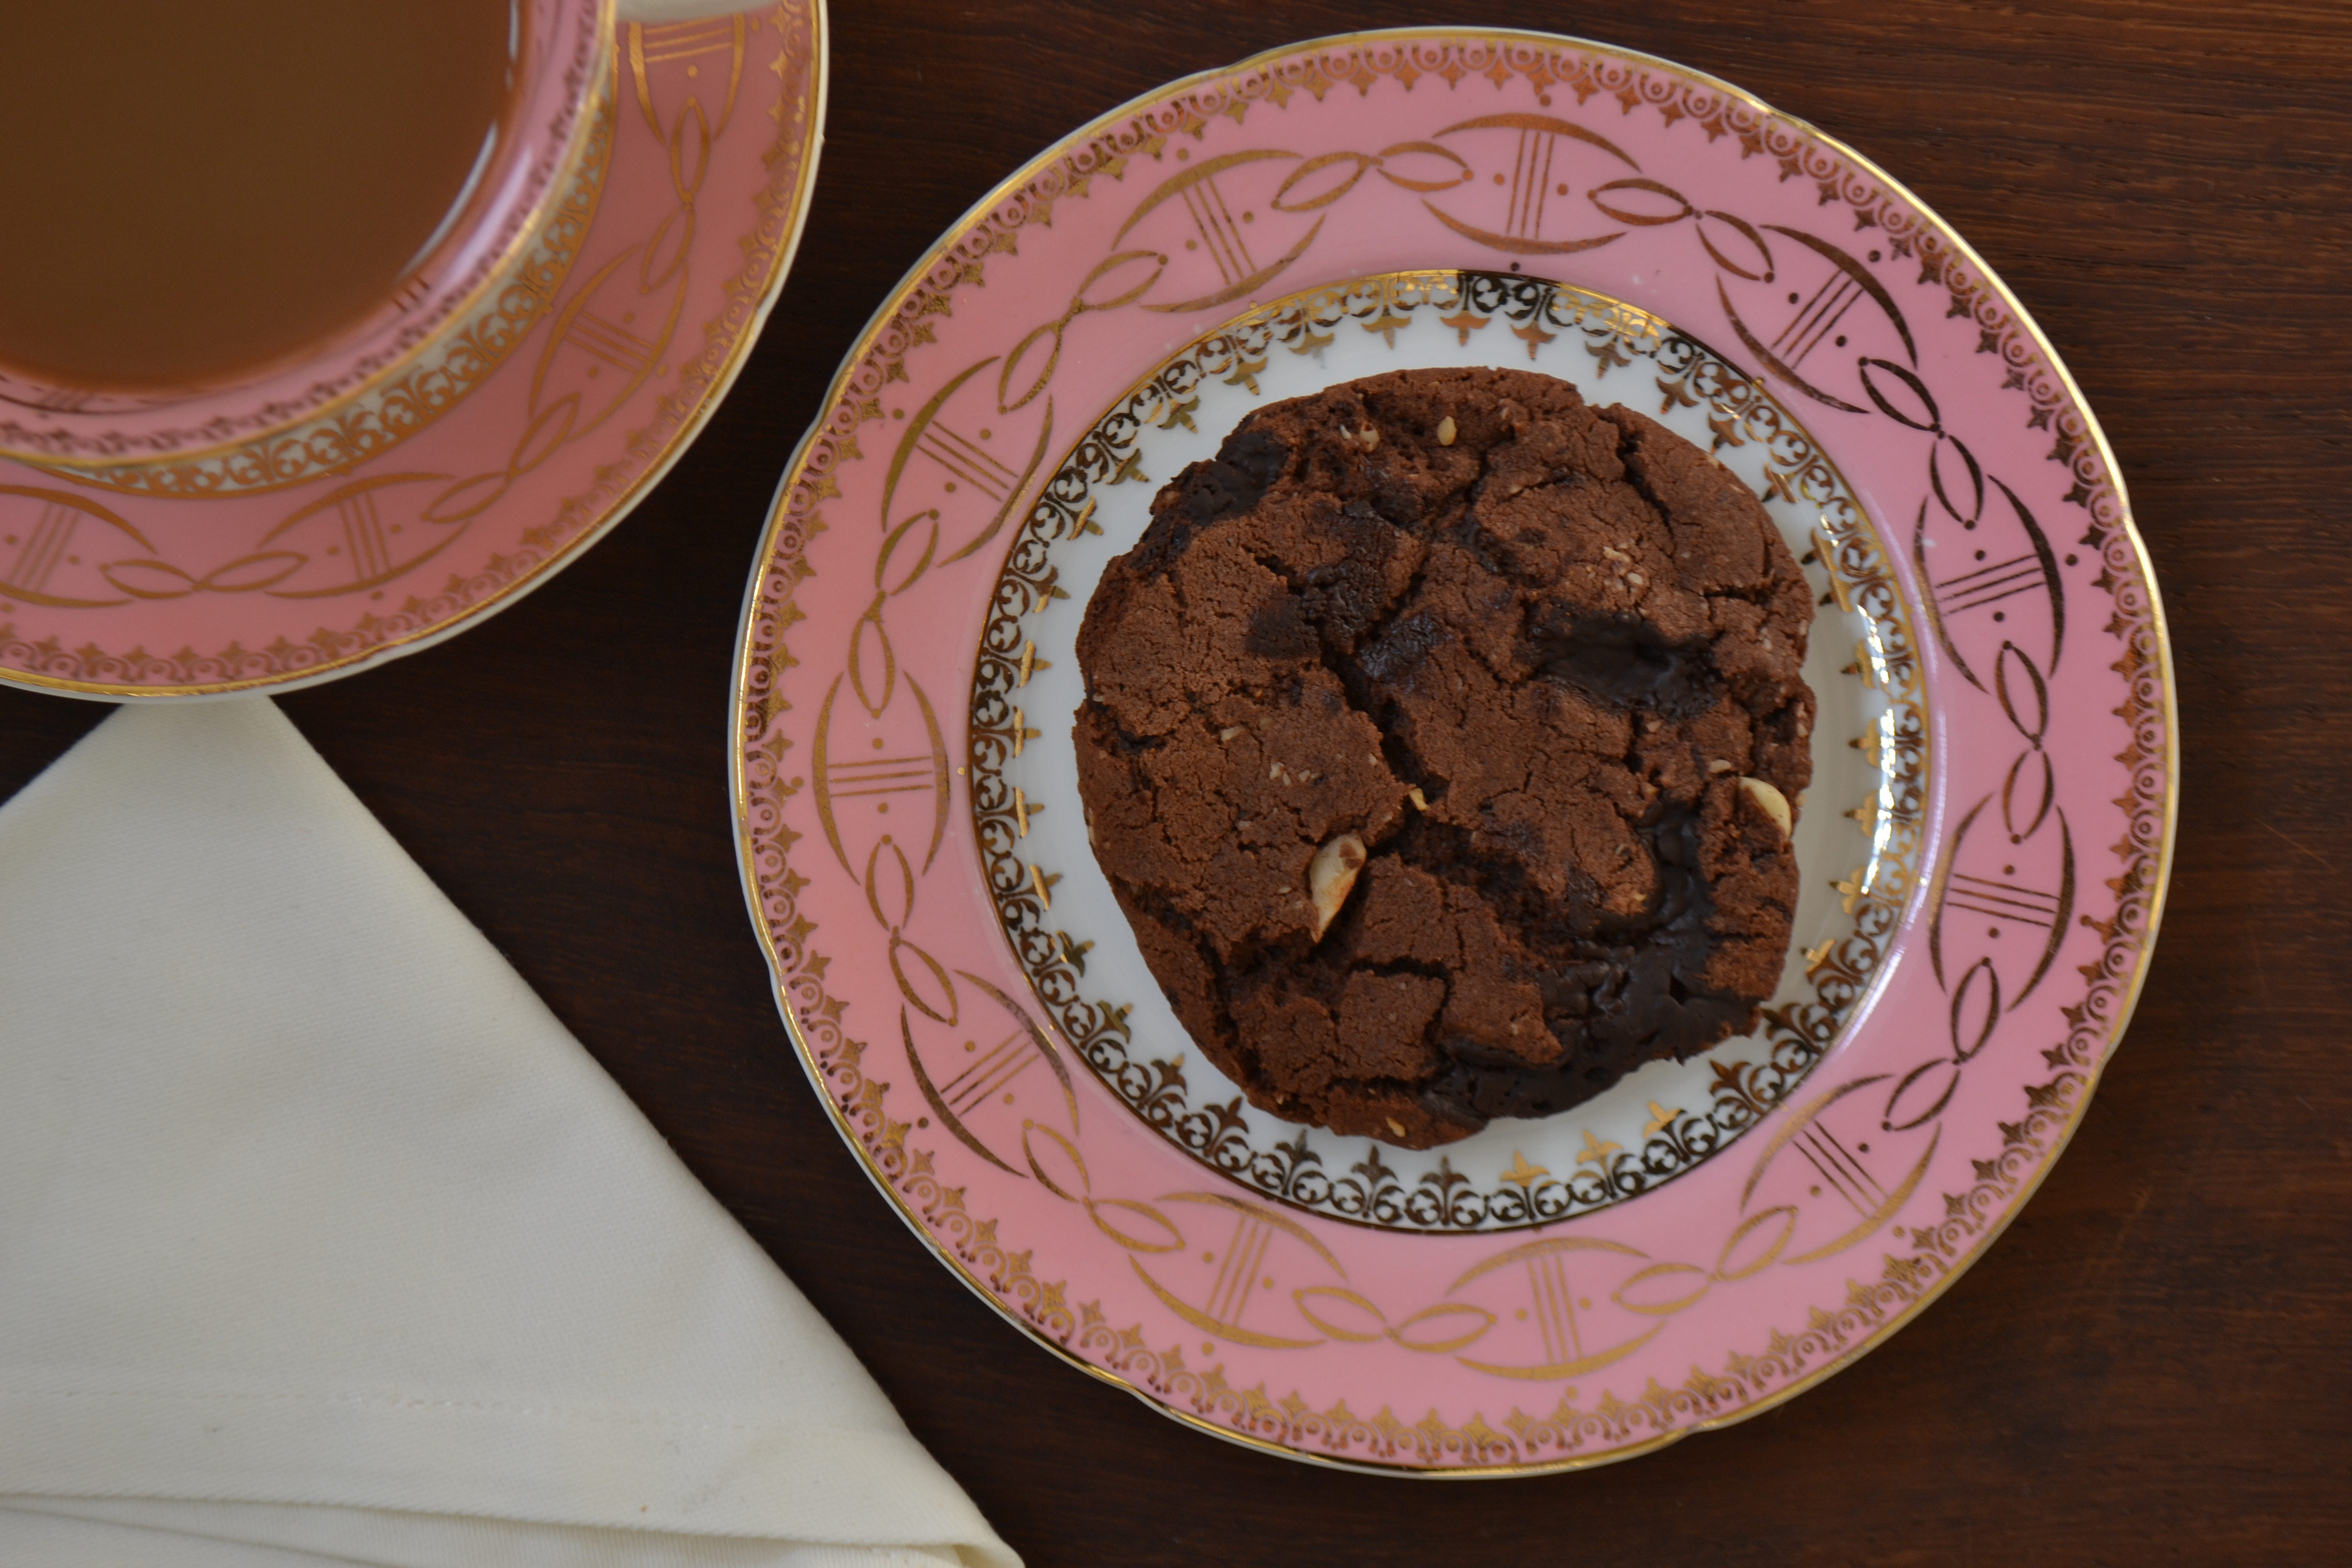
These are deep and dark in flavour. They are incredibly satisfying without being too sweet and sugary. The rest is up to you – I used dark chocolate chunks and toasted hazelnuts, but feel free to add whichever bits you like for texture.

Dark chocolate cookies

Makes around 16-20, depending on size

Ingredients

125g salted butter
125g dark brown soft sugar
125g caster sugar
1 egg, beaten
1/2 tsp sea salt
1 tsp vanilla extract
50g cocoa powder
220g self-raising flour
200g chocolate pieces, or a mixture of 150g chocolate and 50g fruit or nuts

Method

Preheat the oven to 180C/Gas Mark 4. Line two large baking trays with non-stick baking paper.

Place the butter and sugars into a bowl or stand mixer and beat together well, until smooth and mid-brown in colour. 

Next, add the beaten egg, salt and vanilla and mix well. And now, sift in the cocoa powder and self raising flour. Beat to form a stiff dough.

Finally, stir in the pieces you are using. Pinch off pieces of mixture and roll into round balls and place well-spread out on to the baking sheets. Once all the mixture is rolled into balls, take a flat-bottomed drinking glass and press the cookies down to flatten them. They still want to be about 10-15mm thick, but it does make them look better once cooked.

Bake in the preheated oven for 10-15 minutes (my oven takes around 12 minutes) until slightly firm around the edges, but retaining a soft centre. Allow to cool on the baking tray for 10 minutes after removing from the oven, then transfer to a wire rack to cool fully (or enjoy whilst warm!)

Filed Under: Baking, Recipes, Uncategorized Tagged With: best chocolate recipe, best cookie recipe, chewy cookie recipe, chocolate and hazelnut cookies, chocolate cookie recipe, Cookie recipe, sort cookie recipe

Butter and milk buns

26 August 2014 By Charlotte Pike

1Buns

There’s something special about a really good bun. Home made burgers are a wonderful thing, and I published my best-ever recipe in one of my cookery books. I think most people will now recognize that a bad burger patty is just not nice, but I think more and more people are coming to realize that a bad bun is just as bad.

This is a great, easy recipe for an enriched dough, made with butter and milk. It’s half way towards a brioche, which I also really like, but I feel as though this is a slightly more versatile bun, which also goes extremely well with the aubergine burger recipe in my vegetarian cookbook.

Butter and milk buns

Makes 12 large buns

Ingredients

550g strong white bread flour, plus extra for kneading.

1 tsp sea salt

2 heaped tsp quick action dried yeast (I find Doves Farm the best)

300ml full cream milk

50 butter, melted

2 egg yolks

You may wish to glaze the buns with 1 egg yolk and a sprinkling of sesame seed

Method

1)   Place the dry ingredients into a large mixing bowl. Make a well in the centre.

2)   Then, put all the remaining wet ingredients into a jug and whisk together.

3)   Pour the wet ingredients into the dry and mix to form a sticky wet, dough.

4)   If using a stand mixer, knead for 10 minutes on a medium speed. If making the buns by hand, then turn the dough out onto a floured surface and knead for around 10 minutes until smooth and ever so slightly tacky to the touch. Try not to add too much extra flour.

5)   Place the dough into a large mixing bowl and cover well with cling film. I like to put a tea towel over the top, too. Leave for around 4 hours until the dough has doubled in size.

6)   Knead the dough again briefly now, knocking the air out of it. Divide it evenly into 12 pieces and form evenly shaped balls.  Place on a floured tray, cover with clingfilm again, and allow the buns to rise again. This will take around two hours.

7)   Preheat the oven to 230C or equivalent.

8)   Glaze the buns with egg wash and sprinkle over some seeds if you’re using them.

9)   Bake for 25-35 minutes until they feel light, but crusty. They will be a deep, glossy brown.

10)  Allow to cool on a wire rack and devour.

Filed Under: Baking, Dinner, Recipes, Uncategorized Tagged With: brioche buns, Burger bun recipe, Butter and milk bun, homemade burger recipe, hungry student burger, the best burger bun recipe

Fresh ginger gingerbread

5 December 2013 By Charlotte Pike

DSC_5912

This is a great little recipe to have up your sleeve. It’s so simple to make and can be rustled up quickly using mainly store cupboard ingredients. What’s more, adults and children love these biscuits. I make them for friends and they are delighted, and I make them with children and they adore both making them and eating them. They can even be made into Christmas decorations by using a drinking straw to punch out a hole through which you can thread some ribbon and hang them on the tree.

In terms of flavour, I am not sure the fresh ginger adds that much to the biscuits. I do think the texture is very pleasant though. The combination of ground ginger and nutmeg adds a delicious spiciness to the biscuits – if you prefer a more subtle flavour, do omit a teaspoon of ground ginger.

Fresh ginger gingerbread

Makes 18 large biscuits

Ingredients

250g plain flour, plus a little extra for the work surface

85g light brown soft sugar

3 tsp ground ginger

1 tsp ground nutmeg

1 tsp bicarbonate of soda

Pinch salt

75ml golden syrup

120g butter, softened

1 egg yolk

2 tbsp fresh ginger, peeled and finely grated with any liquid discarded

Method

Start by sifting the flour, sugar, ginger, nutmeg, bicarb. and salt into a large mixing bowl and stir to combine.

Add the syrup, butter, egg yolk and fresh ginger and mix well to combine. This is easiest done in a stand mixer. The mixture will form a fairly firm dough when it’s mixed together. Bring the dough into a ball and flatten to form a disc, around 3 cm thick. Cover in cling film and refrigerate for 20-30 minutes.

Meanwhile, preheat the oven to 180C and line two large baking sheets with non-stick baking parchment.

Once the dough is chilled, remove from the fridge and unwrap. Sprinkle the work surface with extra flour and roll out the dough to around 7-9mm thick. Cut out shapes and lay them out on the baking sheet, remembering to leave at least 15mm between each biscuit, as they do expand in the oven.

Once all the shapes have been cut, bake for 7 or 8 minutes for a soft gingerbread texture and 8-10 for a crispier biscuit.

When the biscuits have been cooked, transfer the gingerbread to a wire rack to cool fully. They are rather nice enjoyed warm though. They keep for 7-10 days stored in an airtight container.

Filed Under: Baking, Recipes Tagged With: Fresh ginger gingerbread, Gingerbread, gingerbread recipe

  • « Go to Previous Page
  • Go to page 1
  • Go to page 2
  • Go to page 3
  • Go to page 4
  • Go to page 5
  • Go to Next Page »

Primary Sidebar

Subscribe to my Newsletter

Buy my books

Get in touch

  • E-mail
  • Instagram
  • LinkedIn

Search

Footer

About

  • About
  • Contact
  • Privacy Policy
  • Cookies

Copyright © 2025 Charlotte Pike.
Website by Callia Web

×

Log In

Forgot Password?

Not registered yet? Create an Account